In summary:
- Success in flyboarding isn’t about leg strength; it’s about mastering core stability and making tiny ankle corrections.
- Your equipment setup and, more importantly, calm water conditions are critical for a fast learning curve.
- Learning the correct “Pencil Fall” technique is non-negotiable to avoid impact mistakes and potential ear pain.
- Cognitive focus is your most limited resource; a short, intense first session is far more effective than a long, exhausting one.
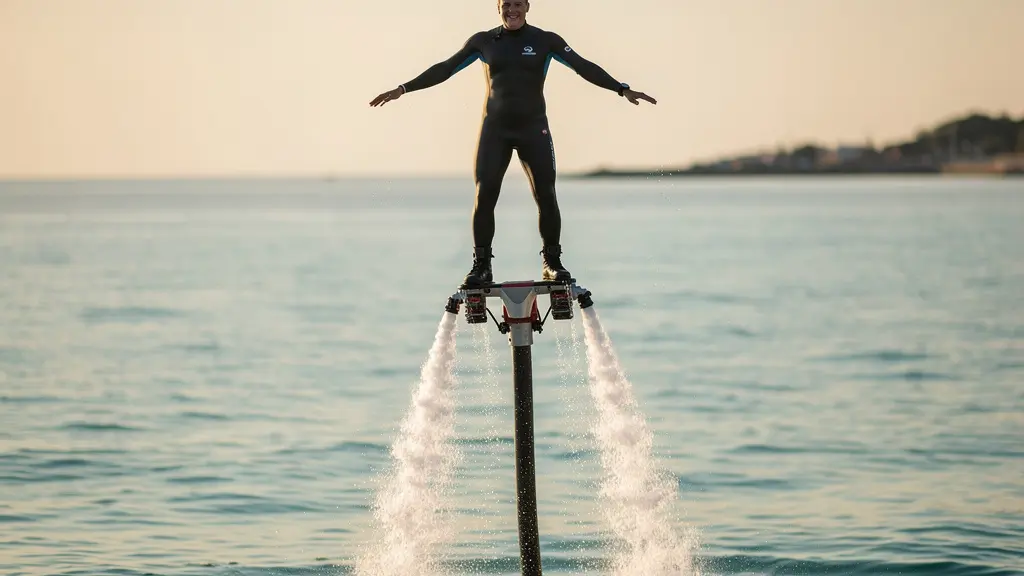
You’ve seen the videos: someone soaring 30 feet above the water, seemingly weightless, propelled by two powerful jets of water. You booked your session, pictured yourself as a superhero, and then spent most of the time face-planting into the sea. The frustration is real, especially when you feel like you’re strong enough. Most advice you’ll hear is to “keep your legs straight” or “use your core,” but this rarely clicks. You might even start to believe you just don’t have the “balance” for it.
This feeling is common because the foundational principles of hydroflight are often misunderstood. The sport looks like a test of power, but it’s actually a game of finesse. It has less in common with lifting weights and more in common with balancing on a slackline. The key isn’t to fight the board with brute force but to understand and work with the physics of water pressure and your own center of gravity. Your arms, for instance, are completely useless for steering; learning to keep them still is one of the first breakthroughs.
But what if the secret to flying in your first 10 minutes wasn’t in your legs at all, but in your ankles and your mind? This guide is built on one core principle: flyboarding is a technical skill based on micro-balance, not a feat of strength. We’re going to bypass the generic advice and give you the technical breakdown an instructor would. We’ll explore why balance trumps strength, how equipment and water conditions set you up for success, and the exact techniques to control your flight and your falls.
This article will provide you with a structured approach to your first flyboarding experience. By understanding the core mechanics before you even hit the water, you’ll be able to translate instructions into action much more quickly. Follow along to turn your first flight from a struggle into a success.
Summary: Flyboarding for Beginners: How to Get Up and Flying in Your First 10 Minutes
- Why Does Balance Matter More Than Leg Strength in Flyboarding?
- Pro Kit or Beginner Nozzle: Which Setup Makes Learning Easier?
- JBR Beach or Palm Jumeirah: Which Spot Has Calmer Water for Learning?
- The Impact Mistake That Causes Ear Pain After a High Fall
- 20 Minutes or 1 Hour: What Is the Ideal Session Length for Stamina?
- 5 AM Start: Why Is Early Morning the Only Viable Time for Summer Sports?
- Why Do Blue Flag Beaches Matter for Your Family’s Health?
- Kitesurfing in Dubai: Where to Find Consistent Wind During Winter Months?
Why Does Balance Matter More Than Leg Strength in Flyboarding?
The single biggest misconception beginners have is that they need powerful legs to push the flyboard into position. This instinct is what causes the constant falling. In reality, the board is held stable by thousands of gallons of water being pushed through the hose by the jet ski. Your job isn’t to overpower it; it’s to act as a rigid rudder. Think of your body from the ankles up as a solid mast. All steering and micro-corrections come from your feet and ankles, not your hips or shoulders. Waving your arms has zero effect on your balance, and trying to use them will only throw off your center of gravity.
The goal is to relax and let the board become an extension of your feet. When you feel a slight tilt, you don’t correct it with a huge leg movement. Instead, you apply subtle pressure with your toes or heels. It’s this principle that allows most beginners to stand up within 3-7 minutes once they stop fighting the board. Your core muscles—your abs and obliques—are crucial here, but not for generating force. Their job is to keep your upper body locked and stable, preventing you from folding at the waist.
By focusing on your core as a stabilizer and your ankles as the steering mechanism, you shift from a model of strength to a model of control. This mental switch is the fastest way to achieve stable flight.
Action Plan: Your Pre-Flight Balance Audit
- Contact Points: Identify all points of contact with the board. Focus on the sensation under your toes, heels, and the sides of your feet. These are your primary sensors for balance.
- Data Collection: On dry land, practice shifting your weight from toes to heels. Inventory how these small movements feel and how your body adjusts its center of gravity in response.
- Consistency Check: Confront the “strong legs” myth. Your goal is not to push against the board, but to maintain a consistent, rigid posture from the ankles up, letting the board move under you.
- Memorability & Emotion: Isolate the feeling of using your core to stabilize. Tense your abs. This rigid upper body is the unique sensation you must replicate in the water, separating it from the generic urge to flail your arms.
- Integration Plan: Before entering the water, commit to one priority: keeping your legs straight but your ankles flexible. This is the single change that will bridge the gap between falling and flying.
Pro Kit or Beginner Nozzle: Which Setup Makes Learning Easier?
While your technique is paramount, the equipment you learn on can dramatically shorten your learning curve. Not all flyboards are created equal, and a setup designed for a professional is fundamentally different from one optimized for a first-timer. The most significant difference lies in the nozzle design and stability base. A beginner setup uses a wider nozzle that distributes the water jet over a larger area, creating a more stable, less “tippy” platform. The base you stand on is also larger, giving you more surface area to balance on.
In contrast, a professional kit uses a narrow, focused jet for maximum power and agility. The boots are stiffer for instant energy transfer, and the rotational system allows for the flips and spins you see in competitions. For a beginner, this setup is overly responsive and unforgiving. Trying to learn on a pro kit is like learning to drive in a Formula 1 car; the slightest mistake is magnified instantly. A beginner kit is designed with limited rotation for safety and a softer boot that is more forgiving of imperfect movements.
This table breaks down the key differences. For your first time, ensuring your provider uses a beginner-friendly setup is one of the easiest ways to guarantee a better experience.
To visualize the difference, look at the engineering behind the water propulsion. The beginner nozzle is built for stability, while the pro nozzle is built for raw, focused power.
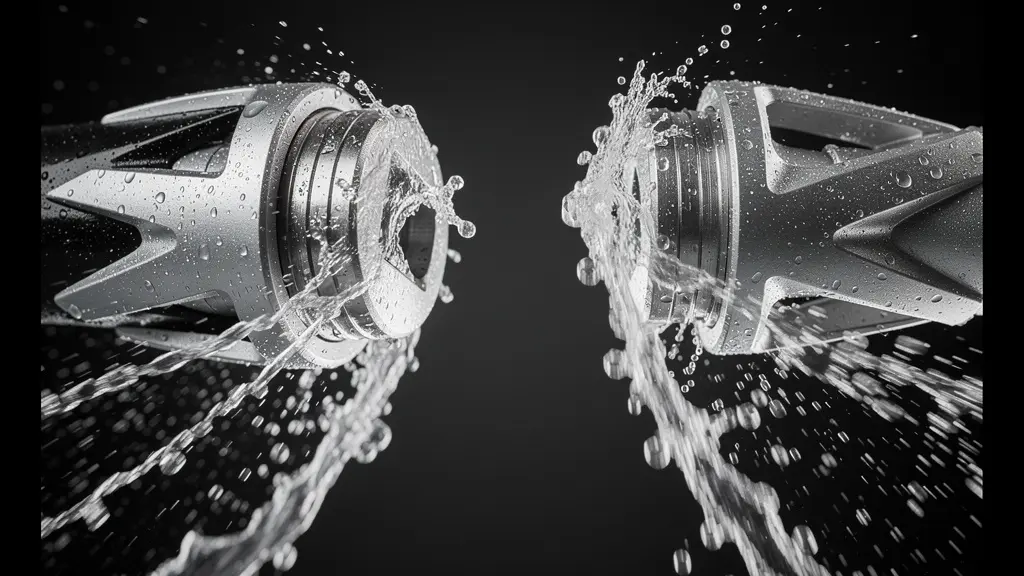
As the comparison shows, the wider, more distributed water flow of a beginner setup provides a foundational stability that allows you to focus on learning balance, rather than constantly fighting the equipment itself. Always confirm with your operator that they use a beginner-friendly nozzle and board.
The following table, based on an analysis of flyboard equipment, clearly shows why the right gear is crucial.
| Feature | Beginner Setup | Pro Setup |
|---|---|---|
| Nozzle Type | Wider, distributed water jet | Narrow, focused jet |
| Stability Base | Larger, more stable platform | Smaller, agile platform |
| Boot Stiffness | Softer, forgiving boots | Stiff boots for instant transfer |
| Rotational Control | Limited rotation for safety | Full 360° capability |
| Learning Curve | 3-7 minutes average | 15+ minutes for basics |
JBR Beach or Palm Jumeirah: Which Spot Has Calmer Water for Learning?
Choosing the right location is just as important as the right equipment. While specific spots like Dubai’s JBR Beach and Palm Jumeirah offer different experiences, the underlying principle is universal: beginners need calm, predictable water. An open beach, exposed to wind and boat traffic, will have choppy water. Trying to learn on a surface that is constantly moving underneath you adds a layer of difficulty that is almost impossible to overcome as a novice. You’ll be fighting both the board and the waves.
A protected bay, lagoon, or the leeward side of an island, by contrast, offers glassy water. This smooth surface provides a stable baseline, allowing you to feel the subtle feedback from the board without interference. Water depth is another critical factor; a minimum depth of three meters (about 10 feet) is essential for safety, ensuring you won’t hit the bottom when you fall. Finally, a good learning spot will have minimal boat traffic to avoid distracting wakes.
One often-overlooked mental trick is to choose a location with a large, stationary object on the horizon to use as a fixed focal point. Focusing your gaze on a distant landmark helps stabilize your body and prevents you from looking down at your feet—a rookie mistake that almost guarantees a fall. It quiets the panicked internal monologue of “don’t fall, don’t fall” and allows you to concentrate on the feeling of balance.
The Impact Mistake That Causes Ear Pain After a High Fall
Falling is an inevitable part of learning to flyboard. But there is a right way and a wrong way to do it. The most common mistake is falling like a ragdoll or trying to catch yourself with your hands. This can lead to awkward impacts, and if you fall from a height, it can cause water to rush into your sinuses and ears, resulting in discomfort or even barotrauma (ear pain from pressure changes). To prevent this, you must master the “Pencil Fall.” It’s a non-negotiable safety technique that every instructor will teach you.
The principle is simple: make your body as streamlined as possible to enter the water cleanly, feet-first. As soon as you feel yourself losing balance, commit to the fall. Pull your arms tightly to your sides, straighten your body into a vertical line, and point your toes downward. Tucking your chin to your chest protects your face and helps maintain the vertical posture. This technique allows you to slice into the water with minimal impact, rather than slapping against the surface.
Responsible instructors will manage your height carefully. Data shows that experienced instructors keep beginners at a safe height of 5ft-12ft. At this altitude, a proper pencil fall is perfectly safe and painless. The goal is to make falling a controlled and repeatable process, removing the fear and allowing you to focus on learning to fly.
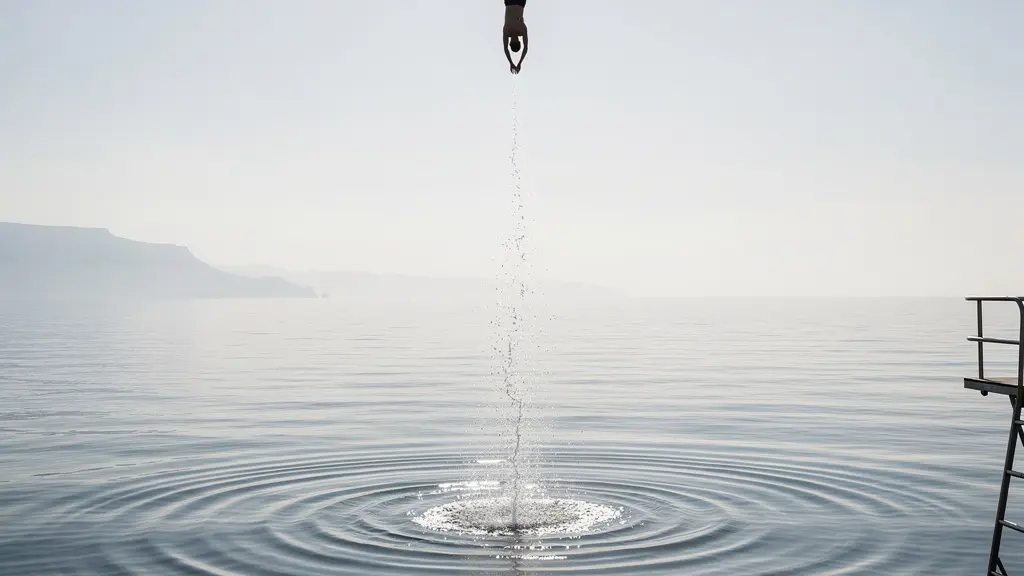
As you can see, the Pencil Fall is a deliberate, controlled maneuver. It turns a moment of panic into a safe, repeatable action, allowing you to get back up and try again without fear or pain.
20 Minutes or 1 Hour: What Is the Ideal Session Length for Stamina?
It seems logical that more time on the board would lead to faster learning, but when it comes to flyboarding, this is not the case. The limiting factor for a beginner is not physical stamina but cognitive fatigue. Balancing on the board requires intense concentration. You are processing a constant stream of new sensory information from your feet, core, and inner ear. For the first 20-30 minutes, your brain is actively building new neural pathways, and your learning curve is steep.
After about 20 minutes of this intense focus, your brain gets tired. Your reactions slow down, you start making basic mistakes again, and frustration sets in. Pushing through for an hour in your first session often leads to diminishing returns and ends with you being too exhausted to even enjoy the moments you are flying. Since most people can get the basics of standing up and steering within the first 5-10 minutes, the rest of the session should be about reinforcing that initial success, not pushing to the point of exhaustion.
A 20- to 30-minute session is the sweet spot for a beginner. It provides enough time to get up, experience the feeling of controlled flight, and practice basic turns, all while your mind is still sharp. It’s better to end on a high note, feeling successful and excited to come back, than to end an hour-long session feeling defeated and sore. Save the longer sessions for when you have mastered the fundamentals and want to work on advanced maneuvers.
Key takeaways
- True control in flyboarding comes from precise ankle micro-corrections and a rigid core, not from leg strength.
- The “Pencil Fall” is a non-negotiable safety technique that prevents injury and ear pain from high falls.
- Early morning sessions offer glassy water, which is the single most important environmental factor for learning quickly.
5 AM Start: Why Is Early Morning the Only Viable Time for Summer Sports?
For watersports like flyboarding, an early morning start isn’t just a preference; it’s a strategic advantage. The single most important factor for a beginner is calm water, and the calmest water of the day is almost always found just after sunrise, typically between 5 AM and 7 AM. This phenomenon is due to a basic principle of meteorology known as thermal wind. During the day, the land heats up faster than the sea, causing air to rise over the land and cooler air to move in from the sea to replace it. This movement of air is what we call wind.
However, in the early morning, this temperature difference is at its minimum. As experts in marine weather note, this equilibrium results in near-zero thermal wind and, consequently, glassy water conditions. This provides the perfect, undisturbed surface for learning.
At dawn, the temperature difference between the land and the sea is minimal, resulting in little to no thermal wind.
– Marine Weather Patterns, Watersports Safety Guidelines
Beyond the calm water, an early start offers numerous other benefits. You avoid the blinding glare of high-angle sunlight on the water, face cooler and more comfortable air temperatures, and share the waterway with far fewer boats, meaning no disruptive wakes. For an instructor, the clear, calm conditions also provide better visibility to monitor your technique and offer corrections. Fighting choppy water is a battle you don’t need to have on your first day.
Why Do Blue Flag Beaches Matter for Your Family’s Health?
When you’re learning to flyboard, you will spend a fair amount of time in the water. While the focus is often on the thrill of the sport, the quality of the water you’re falling into is a critical health and safety consideration. This is where certifications like the Blue Flag program become incredibly important. A Blue Flag beach isn’t just a pretty spot; it’s a location that meets stringent international standards for water quality, safety, and environmental management.
For a flyboarder, the most relevant standard is water quality. Blue Flag beaches are tested regularly for bacteria and other pollutants. Repeated immersion in contaminated water, especially with the high-pressure spray involved in flyboarding, can increase the risk of ear infections, skin irritation, and other waterborne illnesses. Choosing a certified location provides a verifiable assurance that the water is clean and safe for recreational activities.
Furthermore, these certified locations are required to have safety services and equipment readily available, including first aid and trained personnel. This framework of safety and cleanliness ensures that when a provider operates from a Blue Flag beach, they are part of a larger ecosystem of quality control. It’s a clear signal that the operator takes health and safety seriously, which is exactly what you want when trying a new and challenging adventure sport.
Kitesurfing in Dubai: Where to Find Consistent Wind During Winter Months?
Many adrenaline seekers are drawn to sports like kitesurfing or wakeboarding. However, these activities have a significant dependency that flyboarding completely eliminates: the weather. Whether you’re trying to find consistent wind in Dubai during the winter for kitesurfing or waiting for a boat to take you wakeboarding, your session is at the mercy of external factors. Flyboarding’s greatest advantage is its on-demand power and scheduling flexibility.
The power for the flyboard comes directly from the jet ski’s engine, controlled with precision by your instructor’s throttle. It doesn’t rely on unpredictable wind or the availability of a large, expensive wake boat. As long as the water is relatively calm, you can flyboard. This means your session is guaranteed to happen when you book it. You don’t have to worry about showing up to the beach only to find the wind is too light, too strong, or blowing in the wrong direction.
This reliability makes flyboarding a far more efficient sport to learn. The learning curve for kitesurfing can be several hours or even days, much of which is spent waiting for the right conditions. With flyboarding, the basics can be picked up in minutes, allowing you to maximize your time on the water. This table highlights the fundamental differences in dependency.
This comparison, drawing from an overview of on-demand watersports, illustrates why flyboarding offers unparalleled reliability.
| Factor | Flyboarding | Kitesurfing | Wakeboarding |
|---|---|---|---|
| Power Source | On-demand jet ski throttle | Unpredictable wind | Boat schedule dependent |
| Learning Time | 5-10 minutes basics | Several hours minimum | 30-60 minutes |
| Weather Dependency | Works in any calm conditions | Requires specific wind | Calm water needed |
| Instructor Control | Full throttle control | Limited assistance | Boat driver control |
| Schedule Flexibility | Any time, guaranteed | Wind-dependent | Boat availability |
The next logical step is to book your first session with a certified instructor. Go in with this technical knowledge, trust the process, and prepare to fly.
Frequently asked questions about Flyboarding for Beginners
Do I need to know how to swim to try flyboarding?
No, swimming is not required. You’ll be wearing a Coast Guard-approved life jacket the entire time, which keeps you safely afloat in the water between flights.
What safety equipment is provided at certified locations?
Standard safety equipment at any certified flyboarding location includes a life vest and a helmet. Most importantly, a trained and certified instructor will be controlling the throttle and providing real-time coaching.
How does water quality affect the flyboarding experience?
High water quality is crucial for safety and comfort. Since you will be falling into the water repeatedly, clean water significantly reduces the risk of ear infections, skin irritation, and other issues associated with ingesting or being exposed to contaminated water.